The fabulous DT have put together some great technique challenges to get our mojo flowing.
Why not head on over and check the out?
This month I have chosen Distressing as my theme.
This is a great way of adding emphasis to projects as well as distinguishing between layers of patterned papers - I use this technique often

1) Paper Distressing Tool
There are several ways to distress paper to give it an aged or antique
look, or even just to distinguish layers when using multiple patterned papers together. The first way is to use a distressing tool. I use either a Heidi Swapp or a Tim Holtz Edge Distresser – as pictured. I also have a Invild Bolme for Prima tool, which I use occasionally. To use this tool, you simply slide it across the edge of your paper a few times until your edges are as distressed or frayed as you’d like them to be. (Tip: Don’t have a paper distressing tool? You can get a similar effect using a pair of scissors, or a craft knife. Just run the blade of your scissors or knife down the edge of the paper). You can also simply tear the edges of your paper to get a rough edge. Just do this carefully so you don’t tear off more than you intended.
2) Sanding or filing
Using a nail file, sanding block, or sand paper removes some of the color from the paper and gives it a really cool, vintage look. Lay your paper flat on your work surface, and lightly sand the surface of your paper. You can do just the edges or even the entire page. You can also do this your photos for that aged or vintage effect.
3) Inking
Using an ink pad is another great way to add interest and dimension to your paper. I usually ink the very edge of the paper (the white part), then bring the ink onto the front of our paper to create a type of border or frame for my page. I use a blending tool and start it in a circular motion on my craft mat before continuing in the same motion on the edge of the paper/cardstock. If you dont have a blending tool, it is easy to use the inkpad itself, especially if you use catseyes, or mini ones.
When using ink, especially one you havent used before, I recommend inking a piece of plain white scrap paper before putting the ink directly onto the scrapbook page . This way you can get a good idea of how the color will look before you are committed to it. Sometimes the ink translates a lot differently on paper than how you think it will look based on the cover, so I recommend this step if you are inexperienced at inking. You can also use ink to change the colour or look of any chipboard, alphas, and many other items you have in your stash. This can save you $$$ if you dont have the exact embellishment you require to finish a project. I have a number of ink pads I use depending on what I am trying to achieve. The Tim Holtz Distress Inks are gorgeous. They are designed to spread a bit, can be diluted with water, and can be combined with other distress inks. I also use Invild Bolme Prima Fluid Chalk ink. The chalk fluid dries quickly, has a matt chalky finish, and is quite intense in colour. The pad and handle are extremely easy to work with. There are so many different brands and types in the market, in the end it comes down to personal preference.
4) Rolling and tearing
Another of my favorite techniques involves wetting and rolling the edges of the paper. This gives the paper a lot of dimension and character. To do this, I first spray a bit of water onto my craft mat. (Tip: Don’t have a work surface you can spray water onto? Use a plate). Gently rub the edge of the paper into the water to dampen it, then lay it flat on your mat and start rolling up the edge of the paper. Unroll and roll it again until the edges have the look you’re going for.
While you’re rolling, you can also create little tears in the paper. Leave the tears as is, or roll the edges of the tear to create a V shape.
Once you are done rolling and tearing, leave the paper to dry or use a heat gun on it to speed up the process.
If you decide to roll and/or tear your paper, whatever you choose to mount your paper onto will show around the edges a bit. You can use card stock or chipboard that compliments your patterned paper. (Tip: an empty cereal box can be cut and used for chipboard). You can paint or ink the edges of your card stock. You can mount a second patterned paper onto the edges of the card stock. Or you can tuck fabric or lace around the edges (under the paper but on top of the card stock). You can even distress the edges of your card stock with your paper distressing tool or scissors.
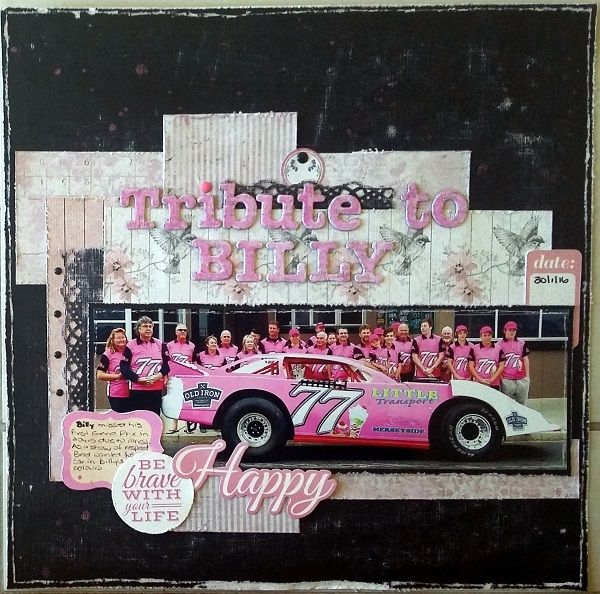
My example:

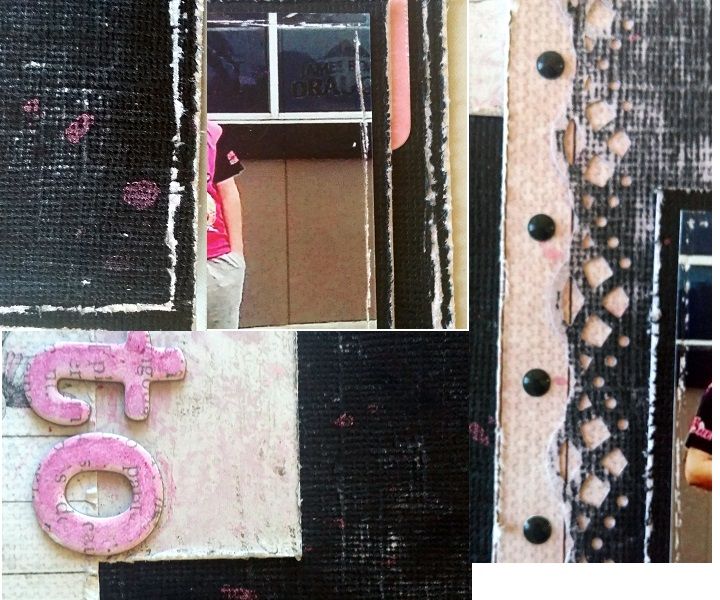
And some close ups:

You will notice I distressed all edges of cardstock and pp's. I also distressed the photo by using my piercing tool to 'draw' an inside edge around it. I copied this theme onto the background cardstock to give the layout flow. I used a sanding block on the background cardstock to shabby it up and also sanded the punched pieces. I used splatters of Perfect Pearls mists, and used my new Tim Holtz Distress markers to watercolour my alphas after sanding them as well.
So, how about it? Wanna play along? Head over to the Pond, sign up if you arent already a member, and play along
Thanks for stopping by and
Deb x
Gorgeous LO, love the color scheme!! Just stopping by from the Bloggie Love Facebook group to say "Hi!"
ReplyDeleteHugs- Elina BL
Artful, inspiring page! Bloggie Love
ReplyDeleteAnother great layout! BL
ReplyDelete